Interfacing 128x64 Monochrome OLED (SSD1306) with Arduino Uno
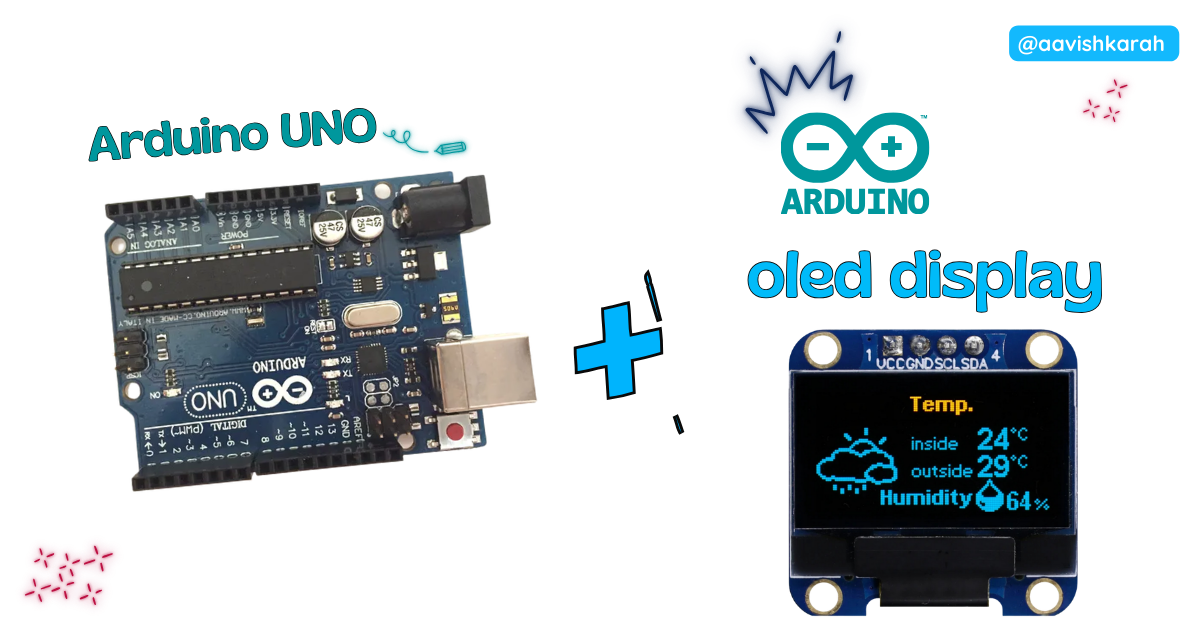
Table of Contents
- 🧾 Abstract
- Hardware Required
- ⚡ Understanding SSD1306 OLED (I2C Communication)
- 🧷 Connection / Wiring Guide (Arduino Uno to OLED)
- 🛠️ Step-by-Step Setup in Arduino IDE
- Code
- 🧠 Code Explanation
- Simulation
- 🧩 Extras (OLED Module Notes + Documentation)
- 🚀 Advanced Tips & Alternative Approaches
- 🛑 Troubleshooting (Common Issues & Fixes)
- 🧪 Optional: I2C Scanner Code
- 🏗️ Project Extensions / Next Steps
- Extras
- 🏁 Conclusion
🧾 Abstract
OLED displays are one of the best upgrades for Arduino projects because they are compact, clear, and power efficient. In this tutorial, you will learn how to interface a 128x64 SSD1306 OLED display with an Arduino Uno using the Arduino IDE. By the end, you will be able to display text, draw shapes, and create small dashboards for sensor projects.
Hardware Required
Arduino boards, sensors, and maker essential Kits—perfectly matched for your learning.

| Component | Specification | Quantity | Purchase Link |
|---|---|---|---|
| Arduino Uno | ATmega328P | 1 | Buy Here |
| OLED Display | SSD1306, 128x64, I2C | 1 | Buy Here |
| Breadboard | Mini/Full Size | 1 | Buy Here |
| Jumper Wires | Male-to-Male | 5+ | Buy Here |
| USB Cable | Mini USB / Micro USB (depends on Uno model) | 1 | Buy Here |
⚡ Understanding SSD1306 OLED (I2C Communication)
The SSD1306 is a display controller used in many 0.96-inch OLED modules. It supports both I2C and SPI, but I2C is more popular because it requires fewer wires.
📌 Why Use OLED with Arduino Uno?
- Great for sensor dashboards 📊
- Very sharp text display ✨
- Low power usage 🔋
- Compact and beginner friendly
- Supports graphics and icons easily
🧷 Connection / Wiring Guide (Arduino Uno to OLED)
Arduino Uno uses dedicated I2C pins:
- A4 = SDA
- A5 = SCL
🔥 Arduino Uno to OLED Pin Mapping
| OLED Pin | Arduino Uno Pin | Description |
|---|---|---|
| VCC | 5V (or 3.3V) | Power supply |
| GND | GND | Ground |
| SDA | A4 | I2C Data |
| SCL | A5 | I2C Clock |
Warning
⚠️ Some OLED modules are 3.3V-only. If your OLED module does not have a regulator, power it using 3.3V.
Tip
Most SSD1306 modules sold for Arduino support 5V VCC because they include onboard regulator.

fig-Connection Diagram
🛠️ Step-by-Step Setup in Arduino IDE
✅ Step 1: Install Arduino IDE
✅ Step 2: Select Board and Port
Note
If upload fails, try selecting Old Bootloader.
✅ Step 3: Install Required OLED Libraries
Go to:
📌 Sketch → Include Library → Manage Libraries
Search and install:
- Adafruit SSD1306
- Adafruit GFX Library
Tip
The Adafruit SSD1306 library depends on Adafruit GFX. Always install both.
✅ Step 4: Verify OLED I2C Address
Most SSD1306 OLED modules use:
0x3C(common)0x3D(rare)
You can verify using I2C scanner code.
 Code
Code
Create a new sketch and paste the following code.
1 2 3 4 5 6 7 8 9 10 11 12 13 14 15 16 17 18 19 20 21 22 23 24 25 26 27 28 29 30 31 32 33 34 35 36 37 38 39 40 41 42 43 44 45 46 47 48 49 50 51 52 53 54 55 56 57 58 59 60 61 62 63 64 65 66 67 68 69 70 71 72 73 74 75 76 77 78 79 80 81 82 83 84 85 86 87 88 89 90 91 92 93 94 95 96 97 98 99 100 101 102 103 104 105 106 107 108 109 110 111 112 113 114 115 116 117 118 119 | |
🧠 Code Explanation
Let’s understand how this works.
 Required Libraries
Wire.h→ Arduino I2C communication libraryAdafruit_GFX→ provides graphics functions (text, lines, shapes)Adafruit_SSD1306→ SSD1306 OLED driver
OLED Configuration
- Sets display resolution
- Reset pin is unused (
-1) - OLED I2C address is set to
0x3C
Display Object Creation
This creates a display instance and connects it to the Arduino I2C bus.
OLED Initialization
if (!display.begin(SSD1306_SWITCHCAPVCC, SCREEN_ADDRESS)) {
  Serial.println("OLED allocation failed!");
  while (true);
}
This checks if OLED is responding correctly.
Warning
If the OLED does not respond, Arduino will stop running forever inside while(true).
Printing Text on OLED
setCursor(x,y)sets text start positionprintln()prints text to buffer
Then:
This pushes the buffer onto the OLED screen.
Drawing Shapes
drawRect()draws outline rectanglefillRect()draws solid rectangle
Counter Demo Loop
static ensures the value remains stored between loop runs.
Simulation
Not able to view the simulation
- Desktop or Laptop : Reload this page ( Ctrl+R )
- Mobile : Use Landscape Mode and reload the page
Arduino boards, sensors, and maker essential Kits—perfectly matched for your learning.
🧩 Extras (OLED Module Notes + Documentation)
📌 OLED Module Types
Most SSD1306 modules come in:
- 0.96 inch 128x64
- 1.3 inch 128x64
Both work similarly.
OLED Power Notes
Warning
Some cheap OLED modules do not have voltage regulator. Supplying 5V may damage them permanently.
Recommended Safe Approach
- Power OLED using 3.3V if unsure.
- Arduino Uno I2C logic is 5V, but most OLED modules tolerate it due to onboard resistors/regulator.
🚀 Advanced Tips & Alternative Approaches
💡 Tip 1: Display Sensor Readings
You can extend the same code to show:
- Temperature (DHT11 / LM35)
- Ultrasonic distance (HC-SR04)
- Potentiometer ADC value
- Battery voltage monitoring
💡 Tip 2: Improve Display Refresh Speed
Instead of clearing full screen every time:
- Update only changed areas
- Avoid unnecessary
clearDisplay()
💡 Tip 3: Use Custom Bitmaps / Icons
You can display icons like WiFi, battery, or logos using bitmap arrays.
Example concept:
🛑 Troubleshooting (Common Issues & Fixes)
❌ Issue 1: OLED Screen is Blank
✅ Causes:
- Wrong wiring (SDA/SCL swapped)
- Wrong I2C address
- OLED not powered properly
✅ Fix:
- Recheck wiring table
- Run I2C scanner code
- Try switching address:
❌ Issue 2: Upload Error (avrdude: stk500)
✅ Cause:
- Wrong processor selected
✅ Fix: Go to:
📌 Tools → Processor → ATmega328P (Old Bootloader)
❌ Issue 3: SSD1306 allocation failed
✅ Cause:
- OLED not detected
- Wrong address or loose wires
✅ Fix:
- Run I2C scanner
- Use proper VCC voltage
- Ensure GND is common
❌ Issue 4: Random garbage pixels appear
✅ Cause:
- Unstable power supply or loose wiring
✅ Fix:
- Use short jumper wires
- Use stable USB power
- Add 100µF capacitor between VCC and GND (optional)
🧪 Optional: I2C Scanner Code
If OLED is not detected, upload this scanner sketch first.
Tip
Open Serial Monitor (9600 baud) and check detected OLED address.
🏗️ Project Extensions / Next Steps
After OLED interfacing, try these awesome beginner projects 🚀
✅ 1. Mini Weather Station 🌦️
- DHT11 + OLED
- Display temperature and humidity
✅ 2. Digital Voltmeter 🔋
- Use analog pin A0
- Display measured voltage on OLED
✅ 3. Distance Meter 📏
- HC-SR04 + OLED
- Display distance in cm
Tip
These are great student mini-projects for IoT and embedded portfolios.
Extras
Components details
- Arduino Uno Data Sheet
📄 SSD1306 Documentation
- SSD1306 Datasheet: SSD1306 Datasheet
- Adafruit SSD1306 Library: Adafruit SSD1306
- Adafruit GFX Library: Adafruit GFX
🏁 Conclusion
You have successfully interfaced a 128x64 SSD1306 OLED display with an Arduino Uno using the Arduino IDE 🎉. Now you can build interactive projects like sensor dashboards, mini clocks, counters, and IoT displays. OLED modules are simple to use but add a professional look to any Arduino project. pare an OLED Dashboard UI code (battery + sensor layout + custom icons) specially designed for Arduino Uno projects 😄