Skip to content

How to interface 16x2 LCD display in serial mode using 2 wire system.
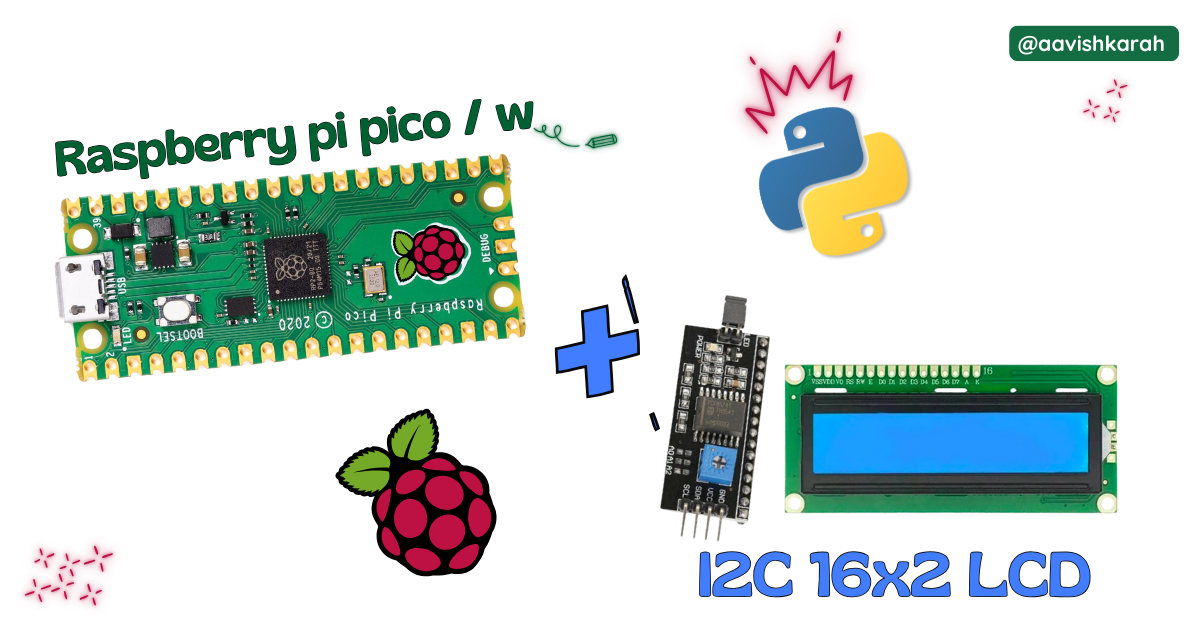
16x2 I2C lcd

Table of Contents

Abstract

In this article, a comprehensive step-by-step guide to interface 16x2 I2C LCD display with Raspberry Pi Pico board using MicroPython. Raspberry Pi Pico has 4 different variants (Pico, Pico 2, Pico W, Pico 2W) supporting micro-python. This articles lays the foundation for more advanced embedded system and IoT projects.

🧭 Pre-Request

  • OS : Windows / Linux / Mac / Chrome
  • Thonny IDE.
  • MicroPython firmware in Raspberry Pi Pico / Pico 2 / Pico W / Pico 2W.

Hardware Required

  • Raspberry Pi Pico / Pico 2 / Pico W / Pico 2W.
  • 16x2 I2C LCD.
  • BreadBoard.
  • Micro USB Cable.
  • Connecting wires.
  • 5V DC power supply (Optional)
Components Purchase Link
Raspberry Pi Pico link
Raspberry Pi Pico 2 link
Raspberry Pi Pico W link
Raspberry Pi Pico 2W link
16x2 I2C LCD link
BreadBoard large : small
Connecting Wires link
Micro USB Cable link
5V DC Adaptor link

Don't own a hardware 😢

No worries,

Still you can learn using simulation. check out simulation part 😃.

Connection Table

Info

16x2 LCD can be connected in 4 wire and 8 wire mode. click here to know how to interface 16x2 LCD display in parallel mode using 4 wire or 8 wire system.

16x2 I2C LCD GPIO Remarks
GND (1) GND Ground
VCC (2) +5 V +5V of Board or External 5V DC Supply
SDA (3) 8 I2C0 series SDA pin
SCL (4) 9 I2C0 series SCL pin

Note

  • VCC (2) can be connected to external +5 V DC supply or to the VBUS pin number 40 of Raspberry Pi Pico Board.
  • While using External 5 V supply for 16x2 LCD, make sure ground pin of External Supply and Pico board is connected.

Circuit Diagram

fig-Connection Diagram

📂 Code

from machine import Pin, SoftI2C
from pico_i2c_lcd import I2cLcd
from time import sleep

# LCD I2C address and dimensions
I2C_ADDR = 0x27
I2C_NUM_ROWS = 2
I2C_NUM_COLS = 16

# Initialize I2C 
i2c = SoftI2C(sda=Pin(8), scl=Pin(9), freq=400000)

# Initialize 16x2 LCD 
lcd = I2cLcd(i2c, I2C_ADDR, I2C_NUM_ROWS, I2C_NUM_COLS)

sleep(0.25)

# Clear the LCD
lcd.clear()

# By default, it will start at (0,0) if the display is empty
lcd.putstr("   Welcome to   ")
sleep(1)

# Starting at the second line (0, 1)
lcd.move_to(0, 1)
lcd.putstr("  Aavishkarah   ")
sleep(4)

# turn off baklight
lcd.backlight_off()
lcd.display_off()
# library from https://github.com/TexturedPolak/RPI-PICO-I2C-LCD
import time

class LcdApi:

    # Implements the API for talking with HD44780 compatible character LCDs.
    # This class only knows what commands to send to the LCD, and not how to get
    # them to the LCD.
    #
    # It is expected that a derived class will implement the hal_xxx functions.
    #
    # The following constant names were lifted from the avrlib lcd.h header file,
    # with bit numbers changed to bit masks.

    # HD44780 LCD controller command set
    LCD_CLR             = 0x01  # DB0: clear display
    LCD_HOME            = 0x02  # DB1: return to home position

    LCD_ENTRY_MODE      = 0x04  # DB2: set entry mode
    LCD_ENTRY_INC       = 0x02  # DB1: increment
    LCD_ENTRY_SHIFT     = 0x01  # DB0: shift

    LCD_ON_CTRL         = 0x08  # DB3: turn lcd/cursor on
    LCD_ON_DISPLAY      = 0x04  # DB2: turn display on
    LCD_ON_CURSOR       = 0x02  # DB1: turn cursor on
    LCD_ON_BLINK        = 0x01  # DB0: blinking cursor

    LCD_MOVE            = 0x10  # DB4: move cursor/display
    LCD_MOVE_DISP       = 0x08  # DB3: move display (0-> move cursor)
    LCD_MOVE_RIGHT      = 0x04  # DB2: move right (0-> left)

    LCD_FUNCTION        = 0x20  # DB5: function set
    LCD_FUNCTION_8BIT   = 0x10  # DB4: set 8BIT mode (0->4BIT mode)
    LCD_FUNCTION_2LINES = 0x08  # DB3: two lines (0->one line)
    LCD_FUNCTION_10DOTS = 0x04  # DB2: 5x10 font (0->5x7 font)
    LCD_FUNCTION_RESET  = 0x30  # See "Initializing by Instruction" section

    LCD_CGRAM           = 0x40  # DB6: set CG RAM address
    LCD_DDRAM           = 0x80  # DB7: set DD RAM address

    LCD_RS_CMD          = 0
    LCD_RS_DATA         = 1

    LCD_RW_WRITE        = 0
    LCD_RW_READ         = 1

    def __init__(self, num_lines, num_columns):
        self.num_lines = num_lines
        if self.num_lines > 4:
            self.num_lines = 4
        self.num_columns = num_columns
        if self.num_columns > 40:
            self.num_columns = 40
        self.cursor_x = 0
        self.cursor_y = 0
        self.implied_newline = False
        self.backlight = True
        self.display_off()
        self.backlight_on()
        self.clear()
        self.hal_write_command(self.LCD_ENTRY_MODE | self.LCD_ENTRY_INC)
        self.hide_cursor()
        self.display_on()

    def clear(self):
        # Clears the LCD display and moves the cursor to the top left corner
        self.hal_write_command(self.LCD_CLR)
        self.hal_write_command(self.LCD_HOME)
        self.cursor_x = 0
        self.cursor_y = 0

    def show_cursor(self):
        # Causes the cursor to be made visible
        self.hal_write_command(self.LCD_ON_CTRL | self.LCD_ON_DISPLAY |
                            self.LCD_ON_CURSOR)

    def hide_cursor(self):
        # Causes the cursor to be hidden
        self.hal_write_command(self.LCD_ON_CTRL | self.LCD_ON_DISPLAY)

    def blink_cursor_on(self):
        # Turns on the cursor, and makes it blink
        self.hal_write_command(self.LCD_ON_CTRL | self.LCD_ON_DISPLAY |
                            self.LCD_ON_CURSOR | self.LCD_ON_BLINK)

    def blink_cursor_off(self):
        # Turns on the cursor, and makes it no blink (i.e. be solid)
        self.hal_write_command(self.LCD_ON_CTRL | self.LCD_ON_DISPLAY |
                            self.LCD_ON_CURSOR)

    def display_on(self):
        # Turns on (i.e. unblanks) the LCD
        self.hal_write_command(self.LCD_ON_CTRL | self.LCD_ON_DISPLAY)

    def display_off(self):
        # Turns off (i.e. blanks) the LCD
        self.hal_write_command(self.LCD_ON_CTRL)

    def backlight_on(self):
        # Turns the backlight on.

        # This isn't really an LCD command, but some modules have backlight
        # controls, so this allows the hal to pass through the command.
        self.backlight = True
        self.hal_backlight_on()

    def backlight_off(self):
        # Turns the backlight off.

        # This isn't really an LCD command, but some modules have backlight
        # controls, so this allows the hal to pass through the command.
        self.backlight = False
        self.hal_backlight_off()

    def move_to(self, cursor_x, cursor_y):
        # Moves the cursor position to the indicated position. The cursor
        # position is zero based (i.e. cursor_x == 0 indicates first column).
        self.cursor_x = cursor_x
        self.cursor_y = cursor_y
        addr = cursor_x & 0x3f
        if cursor_y & 1:
            addr += 0x40    # Lines 1 & 3 add 0x40
        if cursor_y & 2:    # Lines 2 & 3 add number of columns
            addr += self.num_columns
        self.hal_write_command(self.LCD_DDRAM | addr)

    def putchar(self, char):
        # Writes the indicated character to the LCD at the current cursor
        # position, and advances the cursor by one position.
        if char == '\n':
            if self.implied_newline:
                # self.implied_newline means we advanced due to a wraparound,
                # so if we get a newline right after that we ignore it.
                pass
            else:
                self.cursor_x = self.num_columns
        else:
            self.hal_write_data(ord(char))
            self.cursor_x += 1
        if self.cursor_x >= self.num_columns:
            self.cursor_x = 0
            self.cursor_y += 1
            self.implied_newline = (char != '\n')
        if self.cursor_y >= self.num_lines:
            self.cursor_y = 0
        self.move_to(self.cursor_x, self.cursor_y)

    def putstr(self, string):
        # Write the indicated string to the LCD at the current cursor
        # position and advances the cursor position appropriately.
        for char in string:
            self.putchar(char)

    def custom_char(self, location, charmap):
        # Write a character to one of the 8 CGRAM locations, available
        # as chr(0) through chr(7).
        location &= 0x7
        self.hal_write_command(self.LCD_CGRAM | (location << 3))
        self.hal_sleep_us(40)
        for i in range(8):
            self.hal_write_data(charmap[i])
            self.hal_sleep_us(40)
        self.move_to(self.cursor_x, self.cursor_y)

    def hal_backlight_on(self):
        # Allows the hal layer to turn the backlight on.
        # If desired, a derived HAL class will implement this function.
        pass

    def hal_backlight_off(self):
        # Allows the hal layer to turn the backlight off.
        # If desired, a derived HAL class will implement this function.
        pass

    def hal_write_command(self, cmd):
        # Write a command to the LCD.
        # It is expected that a derived HAL class will implement this function.
        raise NotImplementedError

    def hal_write_data(self, data):
        # Write data to the LCD.
        # It is expected that a derived HAL class will implement this function.
        raise NotImplementedError

    def hal_sleep_us(self, usecs):
        # Sleep for some time (given in microseconds)
        time.sleep_us(usecs)
# library from https://github.com/TexturedPolak/RPI-PICO-I2C-LCD
import utime
import gc

from lcd_api import LcdApi
from machine import I2C

# PCF8574 pin definitions
MASK_RS = 0x01       # P0
MASK_RW = 0x02       # P1
MASK_E  = 0x04       # P2

SHIFT_BACKLIGHT = 3  # P3
SHIFT_DATA      = 4  # P4-P7

class I2cLcd(LcdApi):

    #Implements a HD44780 character LCD connected via PCF8574 on I2C

    def __init__(self, i2c, i2c_addr, num_lines, num_columns):
        self.i2c = i2c
        self.i2c_addr = i2c_addr
        self.i2c.writeto(self.i2c_addr, bytes([0]))
        utime.sleep_ms(20)   # Allow LCD time to powerup
        # Send reset 3 times
        self.hal_write_init_nibble(self.LCD_FUNCTION_RESET)
        utime.sleep_ms(5)    # Need to delay at least 4.1 msec
        self.hal_write_init_nibble(self.LCD_FUNCTION_RESET)
        utime.sleep_ms(1)
        self.hal_write_init_nibble(self.LCD_FUNCTION_RESET)
        utime.sleep_ms(1)
        # Put LCD into 4-bit mode
        self.hal_write_init_nibble(self.LCD_FUNCTION)
        utime.sleep_ms(1)
        LcdApi.__init__(self, num_lines, num_columns)
        cmd = self.LCD_FUNCTION
        if num_lines > 1:
            cmd |= self.LCD_FUNCTION_2LINES
        self.hal_write_command(cmd)
        gc.collect()

    def hal_write_init_nibble(self, nibble):
        # Writes an initialization nibble to the LCD.
        # This particular function is only used during initialization.
        byte = ((nibble >> 4) & 0x0f) << SHIFT_DATA
        self.i2c.writeto(self.i2c_addr, bytes([byte | MASK_E]))
        self.i2c.writeto(self.i2c_addr, bytes([byte]))
        gc.collect()

    def hal_backlight_on(self):
        # Allows the hal layer to turn the backlight on
        self.i2c.writeto(self.i2c_addr, bytes([1 << SHIFT_BACKLIGHT]))
        gc.collect()

    def hal_backlight_off(self):
        #Allows the hal layer to turn the backlight off
        self.i2c.writeto(self.i2c_addr, bytes([0]))
        gc.collect()

    def hal_write_command(self, cmd):
        # Write a command to the LCD. Data is latched on the falling edge of E.
        byte = ((self.backlight << SHIFT_BACKLIGHT) |
                (((cmd >> 4) & 0x0f) << SHIFT_DATA))
        self.i2c.writeto(self.i2c_addr, bytes([byte | MASK_E]))
        self.i2c.writeto(self.i2c_addr, bytes([byte]))
        byte = ((self.backlight << SHIFT_BACKLIGHT) |
                ((cmd & 0x0f) << SHIFT_DATA))
        self.i2c.writeto(self.i2c_addr, bytes([byte | MASK_E]))
        self.i2c.writeto(self.i2c_addr, bytes([byte]))
        if cmd <= 3:
            # The home and clear commands require a worst case delay of 4.1 msec
            utime.sleep_ms(5)
        gc.collect()

    def hal_write_data(self, data):
        # Write data to the LCD. Data is latched on the falling edge of E.
        byte = (MASK_RS |
                (self.backlight << SHIFT_BACKLIGHT) |
                (((data >> 4) & 0x0f) << SHIFT_DATA))
        self.i2c.writeto(self.i2c_addr, bytes([byte | MASK_E]))
        self.i2c.writeto(self.i2c_addr, bytes([byte]))
        byte = (MASK_RS |
                (self.backlight << SHIFT_BACKLIGHT) |
                ((data & 0x0f) << SHIFT_DATA))      
        self.i2c.writeto(self.i2c_addr, bytes([byte | MASK_E]))
        self.i2c.writeto(self.i2c_addr, bytes([byte]))
        gc.collect()

Code Explanation

👉 Imports

1
2
3
from machine import Pin, SoftI2C
from pico_i2c_lcd import I2cLcd
from time import sleep
  • time module for creating delay.
  • pico_i2c_lcd module for interacting with 16x2 I2C lcd display hardware.

👉 I2C address defnition.

5
6
7
8
# LCD I2C address and dimensions
I2C_ADDR = 0x27
I2C_NUM_ROWS = 2
I2C_NUM_COLS = 16
  • 0x27 is the address of I2C LCD module.
  • Setting number of rows and columns of LCD display.

👉 Instance of LCD display object.

# Initialize I2C 
i2c = SoftI2C(sda=Pin(8), scl=Pin(9), freq=400000)

# Initialize 16x2 LCD 
lcd = I2cLcd(i2c, I2C_ADDR, I2C_NUM_ROWS, I2C_NUM_COLS)
  • Creating the instance of i2c communication object.
    • SDA pin to GPIO 8
    • SCL pin to GPIO 9
    • Depending upon your connection, change the GPIO pin numbers.
  • Initialize the lcd Module I2cLcd(i2c, I2C_ADDR, I2C_NUM_ROWS, I2C_NUM_COLS)
    • no of rows (2) and columns (16) for 16x2 LCD display
    • if you are chosing 20x4 LCD module, change rows to 4 and column to 20

👉 Displaying the content

# Clear the LCD
lcd.clear()

# By default, it will start at (0,0) if the display is empty
lcd.putstr("   Welcome to   ")
sleep(1)

# Starting at the second line (0, 1)
lcd.move_to(0, 1)
lcd.putstr("  Aavishkarah   ")
sleep(4)

# turn off baklight
lcd.backlight_off()
lcd.display_off()
  • lcd.clear() clear the screen and set the cursor position to (Row 1 and Column 1)
  • lcd.putstr() used to send data to lcd module for display.
  • lcd.move_to(<column>, <row>)
  • lcd.move_to(0, 1) place the cursor to second line(row) and first character(column) position.
  • lcd.backlight_off() turns the backlight led off.
  • lcd.display_off() turns the display off.

Try It

  • Alter the output content on the display by passing your data argument to the putstr method.

Simulation

Not able to view the simulation

  • Desktop or Laptop : Reload this page ( Ctrl+R )
  • Mobile : Use Landscape Mode and reload the page

Extras

Components details

Modules / Libraries Used

  • time
    • time module provides functions related to date & time, measuring time intervals and generating delays.
    • More Details
  • lcd_api
    • To interact with 16x2 LCD display.
    • It is a third part library or user defined library.
    • More Details
  • pico_i2c_lcd
    • To interact with 16x2 I2C module.
    • It is a third part library or user defined library.
    • More Details